![[Tech Corner] How To Mount A Reverb Stealth Seat Post](https://www.mtb-mag.com/wp-content/plugins/accelerated-mobile-pages/images/SD-default-image.png)
![[Tech Corner] How To Mount A Reverb Stealth Seat Post](https://www.mtb-mag.com/wp-content/uploads/2016/05/IMG_0166.jpg)
[ad3]
These days many modern frames make it possible to mount your remote controlled seat post with internal cable routing. Working on and bleeding one is a simple task that can look a bit daunting at first. We break down the steps to mounting easily with no fuss.
Tools: Allen wrenches, cable ties, bike stand, Reverb bleed kit.
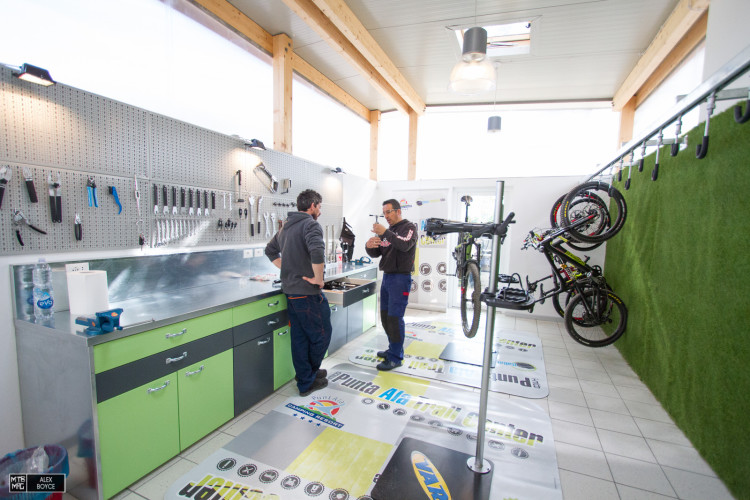
We start this procedure back at our Punta Ala Test center bike workshop, the most important feature being the bike stand and mechanic…
First clean the seat post opening and make sure the clamp works properly. Remove the rear wheel on the bike to create space for working.
Close the remote speed adjuster, unscrew the remote from the hose and make sure the hose closure cap is attached to the open end of the hose. The other end has a magic ball so it is already closed.
Depending on the bike, you should be able to find a rubber grommet on the seat tube. Others may route through the downtube. Each frame design and opening can vary.
Remove the grommet and insert from the bottom the seat post end of the cable, the magic ball should pass through most openings.
Push through enough cable so that there is sufficient slack to mount the post.
Underneath this frame is the second opening where the hose passes back into the down tube. It is worth noting that some frame angles are too tight and you can run the risk of the axle spindle wearing through the hose inside. Use your best judgement if you have two options.
We pass the other end of the hose through into the down tube.
This is the only tricky part, as we push the hose through slowly the end finds the hole pretty easily as the internal part of the frame guides the hose to the hole, if it doesn’t a bit of fiddling helps to pass it through, many frames now include internal cable guides avoiding any problems. We add the rubber grommet and pull through the hose.
Around the bottom bracket the hose path is clear and does not interfere with other cables or hoses, we pull it down and position it with cable ties on the cable boss, we do not tighten up the cable tie yet!
We attach our seat post and magic ball joint to the specified torque settings! Which are really light.
Then secure your post at the desired height.
We feed through the rest of the hose and allow some slack in the hose, enough that the seat post can be adjusted in height as needed inside the seat post tube, this is a fundamental point to remember.
We check our hose length for movement on the bar and shorten if necessary, we attach our remote and avoid pushing the remote if it is hydraulic, check that it works and if we need to bleed (follow our procedure here) with the hose in the bike.
Finally when all these steps are done we can tie down our cable, refit the cable guides and mount the remote on the bar.
Conclusion
It’s important to leave enough hose free for bleeds or being able to adjust the seat post height. Don’t tighten anything down until you are happy that all is functioning and positioning is ideal.
Mechanic Davide Bagnoli @ Punta Ala Trail Center
Today Crankbrothers is launching two new sets of handguards dubbed the Guardian Universal and Guardian…
This past Fall I had an opportunity to test the new Transition Sentinel and was…
If you’ve removed all of your volume reducers but still aren’t getting enough travel on…
After close to a year's time spent aboard the newly updated MY25 Fox 38, it's…
Last Winter Push Industries unveiled a new shock dubbed the SV Eight. The new damper…
In July I attended the launch of a new bike which I've given very high…


